Monday, February 10, 2014

A MOSTLY FAILED ATTEMPT AT MAKING DINNER

So, I thought I would practice my housewife skills last night.
I luckily had the day off & CJ had to work until 10; I wanted him to
come home to a delicious dinner and fresh baked cookies.
Well I made the cookies first (because I finished the last of the chocolate cake) and 
didn't blog it because I was expecting dinner to be the hero of the night.
The cookies were AMAZING and the dinner mostly sucked.

Im not sure what went wrong...if it was my doing or if it was the recipe.
Here is how I made my crappy dinner.


These were the only 2 that came out properly


Ingredients:

AIOLI:
1/2 cup mayonnaise
1 head of roasted garlic
1 lemon juiced and zested
1/4 teaspoon cayenne pepper
Salt & Pepper 


Directions:

Place all the ingredients into a bowl and mash & smash until smooth.
Add the salt & pepper to season.
Put in the fridge until cakes are done.


(the best part of the meal...roasted garlic ♡)


Now for the cakes

Ingredients:

2 cups of cooked quinoa
2/3 cup grated fontina cheese
3 tablespoons all purpose flour
2 green onions, thinly sliced
2 teaspoons of black pepper
2 1/2 tablespoons olive oil
1 egg
salt & pepper to taste


Directions:

Place all the ingredients, except for the oil, into a bowl and mix together.
Season with the salt & pep.

*Allow the quinoa to cool...I burned my hands


Heat up the oil in a large skillet and place over medium heat.

Now this is the part that was the FAIL.

Form the mixture into patties...my mixture was so liquidy there was no patty making
in my kitchen last night.

What I did was place a spoonful of the mixture directly onto the hot pan.


Cook for 5 minutes on each side and repeat until the mixture is gone.


I kept flipping mine prematurely and they kept falling apart.
After this first batch they all kept either burning or falling apart.
BOOO.

2 out of 5 
✭✭☆☆☆

Taste Testers:
LAUREN: This was really frustrating to make because it should have been super simple.
I guess Ive never had Fontina cheese before but I couldn't really taste the cheese. If it weren't for the Aioli (which was really good) these wouldn't have had much flavor.
CJ: I thought these were pretty good.  Maybe some bread crumbs could have been added to improve texture, but I enjoyed the flavor.  A little greasy too.

Monday, February 3, 2014

SILHOUETTE PONIES

CRAFT POST!!!
I was just comparing my DIY posts to my food posts and woah 
food is the winner. I guess I indulge a lot...what can I say?
I love to eat.

So today I am going to print on a crop top.
My subject of choice...PONIES!!!


Things you will need:
Linoleum blocks (i used 3)
Fabric Ink, speedball (any color)
Soft rubber brayer
linoleum cutter (with changeable tips)
1 blank top


Step 1:

Pick out the subject for your prints.
I found 3 great images of horses online & sized them 
so they would fit on my Speedball linoleum blocks.
You have to transfer the image to your block, by either
hand drawing directly on the block or by using carbon paper to trace the image.
I drew directly on the block.

*Keep in mind that whatever you draw will be printed backwards, so don't forget
to flip your image before drawing it on the block.


Step 2:

Use your linoleum cutter tool to carve the block.
Start by outlining the drawn image and work your way out.
Use the smallest blade to start and once you're finished
with your details you can use a bigger blade for the excess around.

*Be careful not to cut yourself, I did


Step 3:

Now its time to start the printing.
You'll need a flat surface to print on , and a piece of plexi glass (ideally) or cardboard
to use as your ink pad.

Here is a video from Speedball demonstrating how to ink up 
your block and how to print it.


After some trial & errors I found that cleaning each block after each 
print makes the prints much cleaner.


Even though Speedball says that you don't need to heat cure the ink,
I ALWAYS do. I have a heat gun, but a hair dryer will work as well.


GIDDY UP!!

If you like my top you can buy it HERE.


Thursday, January 30, 2014

WINTER CITRUS

So every Christmas my husband's grandparents get us a box
of Florida oranges & grapefruits. They are SOOO good, but there is just 
so many of them that it's hard to use them all before they go bad.
We've made LOTS of mimosas with them, but still have a few leftovers.
So I'm making cookies.


 CITRUS DELIQUESCE


Ingredients:

1 1/2 sticks of unsalted butter, room temperature
1 cup of powdered sugar
1 1/2 tablespoons of orange & grapefruit zest
3 tablespoons of orange & grapefruit juice
1 tablespoon of vanilla extract
1 3/4 cup all-purpose flour
2 tablespoons corn starch
1/4 teaspoon salt


Directions:

Preheat the oven to 350 degrees

Zest both the orange and the grapefruit until you get about
1 1/2 tablespoons combined.


Now you need to juice both the orange and the grapefruit. You might as well
juice the whole thing and make a mimosa with the extra juice.
It makes baking a LOT more fun.


Mix the butter & 1/3 cup of powdered sugar in a medium bowl
until light and fluffy. Add the zest, juice & vanilla and beat until
well incorporated.


In a separate bowl mix together the flour, cornstarch & salt.
With the mixer on a low setting add the dry ingredients.
Add small amounts at a time, until well incorporated.


Now divide the dough in 2. Roll each half into a 1 inch diameter log.
Wrap each half up with parchment paper and chill in the fridge for about an hour.

Once you finished an episode of Law and Order (or whatever show you're in to)
remove the dough from the fridge and unwrap.
Slice the logs into 1/4 inch thick slices & place on a lined baking sheet.


Bake for 13-14 minutes or until the cookies turn golden brown.
Once out of the oven let them sit for about 5-10 minutes to cool off.

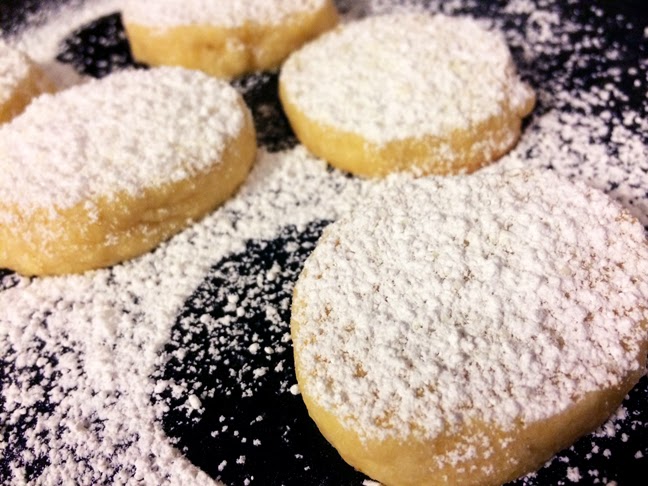
Now for the fun part. Powdered sugar.


Take a flour duster and dust both sides of the cookies.


5 out of 5
✭✭✭✭✭

TASTE TESTERS:

LAUREN: Its hard for me to finish any night without something chocolate, however these cookies were pretty damn good. The texture was like a shortbread cookie, soft, light & fluffy.
They had an amazing citrus flavor, but nothing overwhelming. Perfect balance between sweet and tart.
CJ:  I loved these.  They were a nice subtle variation on the usual lemon bars or cookies with the texture of a shortbread cookie.  So good with a cup of coffee.

Sunday, January 26, 2014

PUPPY TIME

This post is dedicated to a couple of the little men in my life, Tony & Luke.
My puppies.
I wanted to make them all-natural puppy treats that don't upset their sensitive tummies.
Tony has lost several teeth and has trouble eating really hard treats.


PUMPKIN PUPPY TREATS


Ingredients:

2 eggs
1/2 cup canned pumpkin
2 tablespoons dry milk
1/4 teaspoon of sea salt
2 1/2 cups of brown rice flour
1 teaspoon of dried parsley


Directions:

Preheat oven to 350 degrees.

In a large bowl, mix together the eggs & pumpkin until smooth.
Stir in the dry milk, sea salt & dried parsley.


Add the brown rice flour gradually to form a stiff, dry dough.


Roll out dough on a floured surface to your desired thickness.


Use a cookie cutter of your choice (I chose a gingerbread man cutter) & punch out the shapes... gather & re-roll the scraps together.


Place on a baking sheet covered in parchment paper... I used my silicon baking sheets.


Bake these for 20 minutes, remove from the oven & flip the treats over.
Bake for another 5 minutes.


We will have these treats for about a week before I need to make more.
The Taste Testers:
Tony & Luke  LOVED these treats.
Even my picky eater Tony.


* I almost called this blog Soylent Green... because the dogs are eating people*


Monday, January 13, 2014

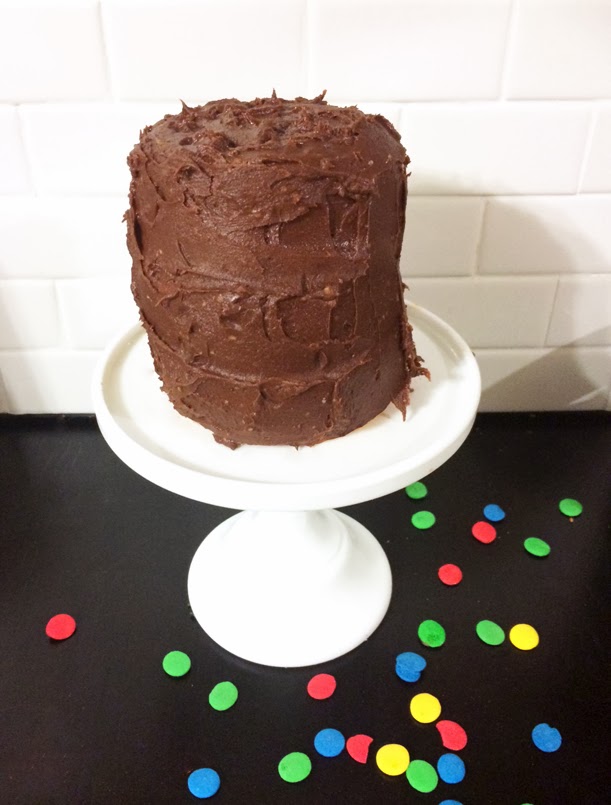
A MIGHTY MINI CAKE

Well, its Saturday... time to make a cake.

I'm planning on making a mini cake for 2 reasons:
            1.   My awesome sister-in-law, Candace, gave me a super cute mini cake stand.
            2.   Last time I made a cake, I did not like it so my husband ate it all.
  I want to make sure if this cake does suck he doesn't eat another 2 layer 9" 
chocolate cake by himself again.
We have a pact ... I die first.


CLASSIC:
Yellow Cake Fudge Icing


Start with the Fudge Icing, it needs to set in the fridge.

FUDGE ICING

Ingredients:

1.5 sticks of unsalted butter
1/2 cup of sugar
3/4  cup of half & half
3 teaspoons of instant coffee powder
10 ounces semisweet chocolate chips
1 teaspoon of vanilla extract
2 1/4 cups powdered sugar
1/4 teaspoon cinnamon


* A special tip... you may want to label your powdered sugar and your flour.
One time my husband made me fried chicken, but he accidentally used the
powdered sugar instead of the flour... what a dum dum*

Directions:


Combine the butter, half & half, sugar, & instant coffee powder in a 
saucepan. 

Set it over medium heat and stir until the mixture comes to a 
simmer.


Remove from the heat, and add the Chocolate chips.
Whisk until smooooooooth.
Pour mixture into a large bowl and 
put in the fridge until its firm enough to spread.


Time for the cake.


Ingredients:

1 3/4 cup of cake flour
2 teaspoons of baking powder
1 teaspoon of salt
1/2 teaspoon of cinnamon
10 tablespoons of unsalted butter (room temp)
3/4 cup of sugar
1/2 cup of brown sugar
3 eggs
1 cup of sour cream


Directions:

Preheat oven to 350 degrees, and butter the sides and bottom of your cake pan.

In a medium sized bowl mix together the flour, baking powder, salt and cinnamon.
Set this aside.


In another bowl, beat (with a mixer)  the butter & both sugars until light and fluffy.
Once fluffy, add the eggs one at a time. Make sure to scape down the sides
of the bowl to get everything mixed well.
Now you're going to add the flour mixture and the sour cream in alternating parts.


At this point the batter tastes pretty darn good.

Don't eat it all though, its time to pour into your desired cake pan(s)


Bake 30-40 minutes.


Make sure its completely cool before you ice ANY cake.


3 of 5 stars
✭✭✭☆☆

Taste Testers:

LAUREN: This was NOT a basic yellow cake recipe. The cinnamon was very prominent and the cake itself was pretty dense...not fluffy. Its not a bad recipe but not what i was expecting.
The icing was more of a Mocha Icing than a Fudge. I could taste the instant coffee pretty well.
CJ: DUHlicious, while the cake might have been a little dense, it was still very soft and moist. The cinnamon was great in it! I thought the icing was a good fudge icing.