Thursday, January 30, 2014

WINTER CITRUS

So every Christmas my husband's grandparents get us a box
of Florida oranges & grapefruits. They are SOOO good, but there is just 
so many of them that it's hard to use them all before they go bad.
We've made LOTS of mimosas with them, but still have a few leftovers.
So I'm making cookies.


 CITRUS DELIQUESCE


Ingredients:

1 1/2 sticks of unsalted butter, room temperature
1 cup of powdered sugar
1 1/2 tablespoons of orange & grapefruit zest
3 tablespoons of orange & grapefruit juice
1 tablespoon of vanilla extract
1 3/4 cup all-purpose flour
2 tablespoons corn starch
1/4 teaspoon salt


Directions:

Preheat the oven to 350 degrees

Zest both the orange and the grapefruit until you get about
1 1/2 tablespoons combined.


Now you need to juice both the orange and the grapefruit. You might as well
juice the whole thing and make a mimosa with the extra juice.
It makes baking a LOT more fun.


Mix the butter & 1/3 cup of powdered sugar in a medium bowl
until light and fluffy. Add the zest, juice & vanilla and beat until
well incorporated.


In a separate bowl mix together the flour, cornstarch & salt.
With the mixer on a low setting add the dry ingredients.
Add small amounts at a time, until well incorporated.


Now divide the dough in 2. Roll each half into a 1 inch diameter log.
Wrap each half up with parchment paper and chill in the fridge for about an hour.

Once you finished an episode of Law and Order (or whatever show you're in to)
remove the dough from the fridge and unwrap.
Slice the logs into 1/4 inch thick slices & place on a lined baking sheet.


Bake for 13-14 minutes or until the cookies turn golden brown.
Once out of the oven let them sit for about 5-10 minutes to cool off.

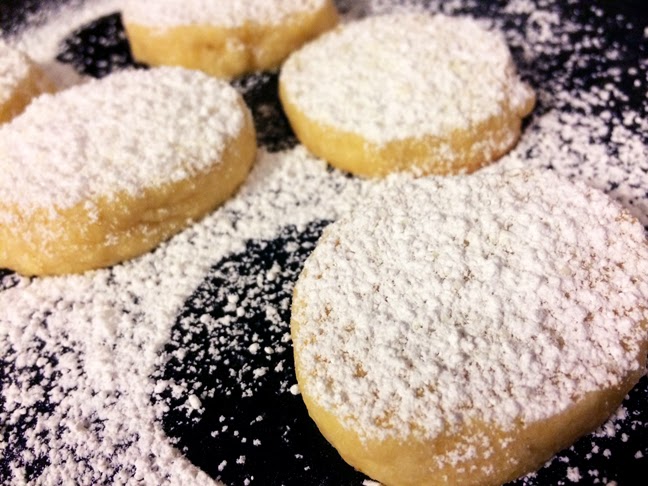
Now for the fun part. Powdered sugar.


Take a flour duster and dust both sides of the cookies.

5 out of 5

TASTE TESTERS:

LAUREN: Its hard for me to finish any night without something chocolate, however these cookies were pretty damn good. The texture was like a shortbread cookie, soft, light & fluffy.
They had an amazing citrus flavor, but nothing overwhelming. Perfect balance between sweet and tart.
CJ:  I loved these.  They were a nice subtle variation on the usual lemon bars or cookies with the texture of a shortbread cookie.  So good with a cup of coffee.

Sunday, January 26, 2014

PUPPY TIME

This post is dedicated to a couple of the little men in my life, Tony & Luke.
My puppies.
I wanted to make them all-natural puppy treats that don't upset their sensitive tummies.
Tony has lost several teeth and has trouble eating really hard treats.


PUMPKIN PUPPY TREATS


Ingredients:

2 eggs
1/2 cup canned pumpkin
2 tablespoons dry milk
1/4 teaspoon of sea salt
2 1/2 cups of brown rice flour
1 teaspoon of dried parsley


Directions:

Preheat oven to 350 degrees.

In a large bowl, mix together the eggs & pumpkin until smooth.
Stir in the dry milk, sea salt & dried parsley.


Add the brown rice flour gradually to form a stiff, dry dough.


Roll out dough on a floured surface to your desired thickness.


Use a cookie cutter of your choice (I chose a gingerbread man cutter) & punch out the shapes... gather & re-roll the scraps together.


Place on a baking sheet covered in parchment paper... I used my silicon baking sheets.


Bake these for 20 minutes, remove from the oven & flip the treats over.
Bake for another 5 minutes.


We will have these treats for about a week before I need to make more.
The Taste Testers:
Tony & Luke  LOVED these treats.
Even my picky eater Tony.


* I almost called this blog Soylent Green... because the dogs are eating people*


Monday, January 13, 2014

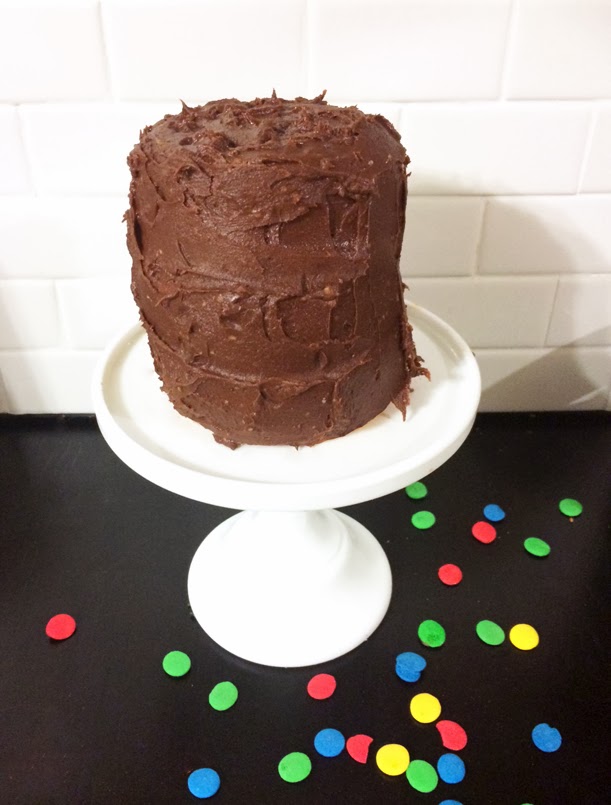
A MIGHTY MINI CAKE

Well, its Saturday... time to make a cake.

I'm planning on making a mini cake for 2 reasons:
            1.   My awesome sister-in-law, Candace, gave me a super cute mini cake stand.
            2.   Last time I made a cake, I did not like it so my husband ate it all.
  I want to make sure if this cake does suck he doesn't eat another 2 layer 9" 
chocolate cake by himself again.
We have a pact ... I die first.


CLASSIC:
Yellow Cake Fudge Icing


Start with the Fudge Icing, it needs to set in the fridge.

FUDGE ICING

Ingredients:

1.5 sticks of unsalted butter
1/2 cup of sugar
3/4  cup of half & half
3 teaspoons of instant coffee powder
10 ounces semisweet chocolate chips
1 teaspoon of vanilla extract
2 1/4 cups powdered sugar
1/4 teaspoon cinnamon


* A special tip... you may want to label your powdered sugar and your flour.
One time my husband made me fried chicken, but he accidentally used the
powdered sugar instead of the flour... what a dum dum*

Directions:


Combine the butter, half & half, sugar, & instant coffee powder in a 
saucepan. 

Set it over medium heat and stir until the mixture comes to a 
simmer.


Remove from the heat, and add the Chocolate chips.
Whisk until smooooooooth.
Pour mixture into a large bowl and 
put in the fridge until its firm enough to spread.


Time for the cake.


Ingredients:

1 3/4 cup of cake flour
2 teaspoons of baking powder
1 teaspoon of salt
1/2 teaspoon of cinnamon
10 tablespoons of unsalted butter (room temp)
3/4 cup of sugar
1/2 cup of brown sugar
3 eggs
1 cup of sour cream


Directions:

Preheat oven to 350 degrees, and butter the sides and bottom of your cake pan.

In a medium sized bowl mix together the flour, baking powder, salt and cinnamon.
Set this aside.


In another bowl, beat (with a mixer)  the butter & both sugars until light and fluffy.
Once fluffy, add the eggs one at a time. Make sure to scape down the sides
of the bowl to get everything mixed well.
Now you're going to add the flour mixture and the sour cream in alternating parts.


At this point the batter tastes pretty darn good.

Don't eat it all though, its time to pour into your desired cake pan(s)


Bake 30-40 minutes.


Make sure its completely cool before you ice ANY cake.


3 of 5 stars
✭✭✭☆☆

Taste Testers:

LAUREN: This was NOT a basic yellow cake recipe. The cinnamon was very prominent and the cake itself was pretty dense...not fluffy. Its not a bad recipe but not what i was expecting.
The icing was more of a Mocha Icing than a Fudge. I could taste the instant coffee pretty well.
CJ: DUHlicious, while the cake might have been a little dense, it was still very soft and moist. The cinnamon was great in it! I thought the icing was a good fudge icing. 


Saturday, December 28, 2013

FRENCH KNOT TUTORIAL


So, it turns out people have been trying to replicate my French Knot tops.
Even though I am flattered, let's leave it to the professionals.
If you're going to do it... do it right.
This project takes time & patience.  And if you have both, you can
create one of these bad boys.
This is what your end result should look like:


Things you will need:
5 colors of embroidery floss
1 embroidery hoop
1 pair of fabric scissors
1 embroidery needle
1 clothes line clip
1 tank top


Step 1:

Take the strap of your tank top and put it in your embroidery hoop.
Stretch the fabric so its tight, but not so much that you damage the top.
Use your clothes pin to keep the excess fabric out of the way.


Start at the top with the lightest color, and work your way down to the darkest.

Here is a video that I found on youtube, this will
show you how to make a french knot.


Step 2: Cut off a piece of embroidery thread about 12 inches long. Make sure to tie off the end of the thread & work back to front. Make your first knot in the top corner of your tank top. It should look like this.
Now you work around that first knot & form clusters. Make sure to leave a small amount of space between the knots, the top looks the best when you can see a bit of the tank top color.
Step 3:
Once you get down to the last inch of thread and find it difficult to make another
knot, its time to tie off the thread and start another.
On the backside of the top you will need to make a knot so the string 
can't pass through the other side.
Use the thread from the other knots to tie it off.
Step 4:
Depending on how large your top is, each color of knots should be 
around an inch long before switching to the next color.
Towards the end, while you're on your final color,
start spreading the knots out further from each other to create
a fading effect.
Step 5: Mirror what you have done on the other side of your top. This is a tedious process but the results are worth it. Just sit on a comfortable couch & watch a few movies. You should send me your final results so I can see what you've  created.  If you need any help, shoot me an email. If you like what you see but are too lazy to make one... I have them for sale here: ETSY

Saturday, December 7, 2013

AN APPLE A DAY...

Here is the second pie I made for thanksgiving.
People really seemed to like this one... personally Im not an apple pie fan.
I've been called "un-American" for not liking it...
those people are ass hats.


I basically just ate the yummy crumb topping off of it &
let my husband eat the rest of it.

Here we go:

"DUTCH APPLE PIE"

This will be done in 3 steps... 
the ingredients will be listed for each step.
So look at the entire recipe before running to the store.

STEP 1


Ingredients:

Pie Crust:
1 1/2 cups of all-purpose flour
1 1/2 Tablespoon of sugar
1/2 cup oil
2 Tablespoons of cold milk


Directions:


Mix the dry ingredients together in the pie plate.


Make a well in the center of the dry ingredients and add the oil and milk mixture. Mix with a fork until dough comes together.
Press evenly on the bottom and sides of plate. Refrigerate while preparing filling and topping.


STEP 2


Ingredients:

The Filling:
1/2 cup of sugar
3 Tablespoons of flour
1 teaspoon of cinnamon
1/8 teaspoon of salt
6 cups of thinly sliced/peeled apples


Directions:

Preheat the oven to 375˚

In a large bowl combine the sugar, flour, cinnamon & salt.


Add the apple slices & mix together to coat. 
Take the apples and arrange them into your pie plate.


Final Step

STEP 3


Ingredients:

The Topping:
1 cup packed brown sugar
1/2 cup flour
1/2 cup of butter
1/2 cup of quick-cooking oats

Directions:

Stir together brown sugar, flour & oats.

Mix in 1/2 a cup of butter with a blender until it resembles course crumbs.
Sprinkle evenly over the pie filling.


Place pie on a cookie sheet to catch all the drippings.
Bake for 50 minutes or until the top layer is brown and the insides
are bubbling. 

Don't be a dumb dumb... let the pie cool before you pick off the crust to eat it.